
Hi friends,
In the previous post, we discussed the meanings of the terms Git & GitHub and also some of the other things we can do with GitHub. In this post, we will see a detailed step by step process of how to start using the GitHub for our projects.
Let's now go through the steps of using the GitHub now.
- Installing Git and creating a GitHub account
- Initializing Git Repository
- Adding a new file to the repo Use the echo command in Windows (touch in Linux) to create a sample text file.
- Adding files to the staging
- Creating a new Repo on GitHub
The first step is install Git on our system following the instructions from the Git website.
Once you have installed the Git on your computer, you also need to create an account on the GitHub website.
The following steps will be done through command prompt/terminal.
The step is to create a new repository/directory (generally called repo) and initializing the git for that repo. This is done by navigating to the directory we want to work in and typing the following command in the command prompt:

Once you have created the new file, you can use the following command to see which files git knows exists in the repo:
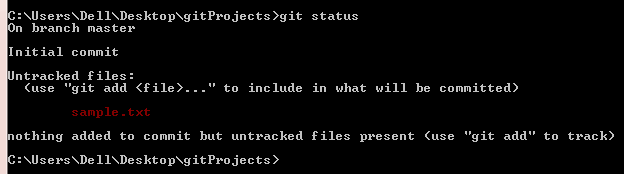
Notice that the git officially doesn't track the created file. We need to do commit to make sure git knows this file exists in the repo.
As in a large application with hundreds of files, we may change only some files and require to commit only those files. So, the add command basically requires us to add the list of files we have made changes to in order to do the commit.
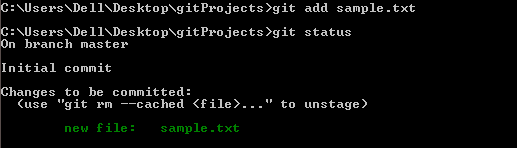
Notice that after using add command then again checking the status, we see that a new file message has appeared.
Now that we have made a commit, we can upload our code to the GitHub website. For this, we need to create a new repository on GitHub by logging onto your GitHub account and clicking the New Repository button.

Next, GitHub will ask you some basic information and once you're done filling out the information, press the 'Create repository' button to make your new repo. Next, follow the instructions under the option 'push an existing repository from the command line' section as we've already created a new repo locally.

Run the above two commands in your command prompt. It will open a window asking you to login in your GitHub account. Once you enter your correct credentials, your commit will take place successfully and you will be able to see the commits in your GitHub profile page.
That's it for the Git & GitHub tutorials. You can now start creating your projects and posting it on GitHub to get attention of the recruiters.

0 comments:
Post a Comment